No edit summary Tag: Source edit |
Tag: Source edit |
||
| Line 203: | Line 203: | ||
*Difficulty & Current HP level |
*Difficulty & Current HP level |
||
{|align="left" style="width:480px;" |
{|align="left" style="width:480px;" |
||
| − | |-style=" |
+ | |-style="background#444;" |
!HP Level!!Normal%!!Bounty%!!Scavenger<br>Nightmare%!!Replay% |
!HP Level!!Normal%!!Bounty%!!Scavenger<br>Nightmare%!!Replay% |
||
| − | |-style=" |
+ | |-style="background#111;" |
|1-20||50||100||150||25 |
|1-20||50||100||150||25 |
||
| − | |-style=" |
+ | |-style="background#222;" |
|21-30||60||120||180||30 |
|21-30||60||120||180||30 |
||
| − | |-style=" |
+ | |-style="background#111;" |
|31-40||70||140||210||35 |
|31-40||70||140||210||35 |
||
| − | |-style=" |
+ | |-style="background#222;" |
|41-60||80||160||240||40 |
|41-60||80||160||240||40 |
||
| − | |-style=" |
+ | |-style="background#111;" |
|61+||100||200||300||50 |
|61+||100||200||300||50 |
||
|} |
|} |
||
| Line 222: | Line 222: | ||
|- |
|- |
||
!Level!!1st Cast%!!2nd Cast% |
!Level!!1st Cast%!!2nd Cast% |
||
| − | |-style=" |
+ | |-style="background#111;" |
|1||75||70 |
|1||75||70 |
||
| − | |-style=" |
+ | |-style="background#222;" |
|2||70||60 |
|2||70||60 |
||
| − | |-style=" |
+ | |-style="background#111;" |
|3||60||50 |
|3||60||50 |
||
|} |
|} |
||
Revision as of 05:40, 23 January 2022
Attenuation
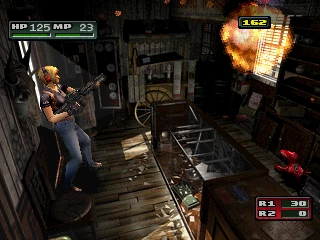
What happened to that base power of 270?!
By definition, it means the gradual loss of flux intensity while traveling through a medium. In this case, it's gunfire traveling to the target, thus the further Aya is from the target, the less damage she does.
Parasite Eve II has 5 sets of values (plus 1 unused), ranging from the furthest away (literally the 'edge' of your damage range) up to point-blank range, equivalent of how close you must get to use a melee attack. If only one attenuation is displayed, that value is consistent for the full range of the weapon. Handguns and automatic weapons are the main users of the variable range. Most shotguns benefit from a close-quarters damage bonus. Weapons with attachments or secondary attacks (Like the Gunblade's melee swing, Javelin, Hammer, etc.) are subject to the same attenuation as the primary attack.
A weapon marked as 0.9 or 0.8 (for example) is not a perfect % damage reduction; most values have an additional minor fraction added on to the penalty.
Penalty chart:
1.2 = 1.0 + 0.2 - 1/640
1.0 = 1.0
0.9 = 1.0 - 0.1 - 1/640
0.8 = 1.0 - 0.2 - 1/320
0.7 = 1.0 - 0.3 - 1/1280
0.6 = 1.0 - 0.4 - 3/1280
0.5 = 0.5
0.4 = 0.5 - 0.1 - 1/640
0.3 = 0.5 - 0.2 - 1/320
A few examples of minimum damage (not counting the % bonus you get per shot):
Buckshot (Power: 40) w/ attenuation of 0.8 = 31 dmg.
5.56 Rifle (Power: 22) w/ attenuation of 0.7 = 15 dmg.
Grenade (Power: 270) w/ attenuation of 0.7 = 188 dmg.
(In-game memory testing shows the values listed are a % out of 100.)
Weapons List
| Name | Rates (Furthest to closest) | ||||
| P08, P08 S.Magazine, P229, Mongoose | 80 | 80 | 90 | 100 | 100 |
| M93R | 50 | 60 | 70 | 80 | 100 |
| M950, MP5A5 (Normal, +1 and +2) | 40 | 50 | 60 | 70 | 70 |
| PA3, SP12, AS12 | 80 | 80 | 80 | 120 | 120 |
| Gunblade | --- 80 --- | ||||
| Grenade Pistol, MM1 | --- 70 --- | ||||
| M4A1 Rifle (Normal, +1 and +2), M4A1 Bayonet, M4A1 Javelin | --- 70 --- | ||||
| M4A1 Hammer, M4A1 Grenade, M4A1 Pyke | --- 60 --- | ||||
| M249 | 30 | 40 | 50 | 60 | 60 |
| Tonfa Baton, Hypervelocity | --- 100 --- | ||||
Basic Stats
HP: How much damage Aya can take before she 'dies', causing a Game Over. Combat and a couple unique room traps (notably in the Shelter) can reduce Aya's HP. Aya can recover HP through the use of recovery items, casting Healing or through a few unique cutscenes.
MP: Available points for casting spells. Running out is not fatal, but could leave Aya in a tight situation if PE Spells are needed to deal with an encounter. Aya can recover MP through the use of recovery items, learning new PE Spells or through a few unique cutscenes.
Aya can raise her stats. by the following means:
- HP through two ways: Equipping armor with HP bonuses and using Protein Capsules to boost her HP cap.
- MP through three ways: Equipping armor, using Lipstick and spending EXP to upgrade/acquire PE Spells.
Different modes can affect how much punishment Aya can take.
| Mode | Starting HP | Starting MP | Damage Bonus/Reduction |
| Normal Mode | 100 | 30 | 100% damage |
| Replay Mode | 100 | 30 | 50% damage, rounded down, minimum damage: 1 |
| Bounty Mode | 100 | 30 | 200% damage |
| Scavenger Mode | 100 | 10 | 300% damage |
| Nightmare Mode | 50 | 30 | 300% damage |
When Aya has to escort an ally, they are given a bar with 100/100 HP. Fortunately, the damage they take is unrelated to the current game mode and will always take damage equivalent to Replay Mode.
Critical Rate
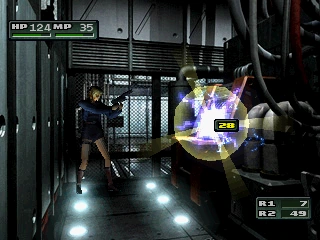
Aya hitting a target for critical damage.
Several weapons have a chance to inflict 4x their normal damage per shot. Barring a couple exceptions, most of these weapons are slower-firing guns that get more damage out of a bullet due to lower attenuation penalties. When a target is hit by a such an attack, a yellow flash appears around the target, signifying they took a critical hit.
Energyshot also affects a weapon's critical hit rate (If it has one). It will increase the rate by 25% on first cast and 40% on a compound cast.
- Example: P08's Critical Rate = 40% -> 50% on first cast, 56% on second.
Critical Rate % effectiveness will vary between enemy types: Some are extra vulnerable to critical hits, like Brutes where the chance is 200% higher, some are resistant, like the 1st No.9 Encounter where it is 50% as effective and some are unaffected, like Scorpions. For instance, if the player is using a Mongoose against No.9 during the first encounter, the critical rate will be 20%, instead of 40%.
(In-game memory testing shows the values listed are a % out of 100.)
Weapons List
Only weapons with a critical rate greater than 0 will be listed:
| P08, P08 S.Magazine | 5 |
| M93R | 30, Single 10, Burst |
| P229 | 40 |
| Mongoose * | 40 |
| Tonfa Baton | 15 (2nd hit, only) |
| M4A1 Rifle ** (Normal, +1 and +2) | 25, Single 5, Burst |
| M4A1 Bayonet ** | 20, Burst |
| M9 (Attachment) | 3 |
| M4A1 Javelin ** | 5, Burst |
- ** The M4A1 series of guns appears to have 2 sets of attenuation/critical values. One batch gives the basic critical rate at 25%,5% and the attenuation of 0.7. The other one has no critical rate and an attenuation rate of 0.6. Only the M4A1 variants with a critical rate are listed above.
Enemy List
The following enemies have a non-standard (as in not 100%) effectiveness rate with critical hits.
| Bosses | |
| No.9(1st time) | 50% |
| No.9(2nd time) | 0% |
| Proto Generator | 0% with life support on |
| Sea Diver | 200% |
| Beta Generator | 0% with life support on |
| Puppet Stinger | 200% |
| Brahman Core | 200% |
| GOLEMs | |
| Pawn GOLEM | 50% |
| Rook GOLEM | 0%, 50% with damaged backpack |
| Fatties | |
| Brute | 200% |
| Mossback | 200% |
| Slouch | 200% |
| Sucklers | |
| Bone Suckler | 0% |
| Blood Suckler | 0% |
| Sucklerceph | Unique Value* |
| NMCs | |
| Bat | 0% |
| Beetle | 0% |
| Green Amoeba | 0% |
| Moth | 0% |
| Red Amoeba | 0% |
| Scorpion | 0% |
- *Sucklerceph appears to have a different setup for critical rates: All critical hit weapons have about a 1 in 3 chance of scoring critical hits (which results on a one-hit kill)
Damage Frame Delay
This applies to attacks and spells that use a physical model, instead of a hitscan attack.
- All Grenades
- All melee weapons
- All M4A1 attachments
- All Gunblade combos
- Hypervelocity
- Pepper Spray
- Necrosis and Pyrokinesis
How it works is: As an attack model comes into contact with a target, the target takes damage. The frame delay controls how fast a target takes damage over time before it dissipates/ends/etc. The higher the value, the less number of times a target will take damage as it is hit by a certain attack.
Javelin Glitch
There is a known glitch with the M4A1 Javelin. Pressing SELECT as the player fires the weapon (then resuming the game) will cause the game to treat the javelin beam as though it were firing the 5.56 Rifle ammo, instead. This changes the the frame delay from 5 to 0 and the type of attack from the Javelin's 0 to a real 0 (Since Javelin appears to have an unique normal-type attack that can affect certain enemies). This has the end result of multiplying the damage done to a target by at least 6x it's normal value (Except in the case of amoebae-type, given they only take stun damage, instead of real damage).
Key Items
Main article: Key Items
While a few Key Items do not serve a gameplay purpose, many of them are used to unlock rooms, solve puzzles, help progress to the next part of the game, etc. To use them at an appropriate place, go to the Key Items menu, select the item and click on it to use.
Some Key Items are also worth Bounty Points at the end of the game which can carry over to the next replay.
Key Items are stored separately from regular inventory items.
Damage Taken
HP lost due to an enemy attack is affected by a number of different variables.
All numbers below represent a % of the original damage done more. In the case of higher-level difficulties, it great increases how much damage the player takes. Casting spells or attaching certain items can reduce the amount of damage a player receives when hit.
- Difficulty & Current HP level
| HP Level | Normal% | Bounty% | Scavenger Nightmare% |
Replay% |
|---|---|---|---|---|
| 1-20 | 50 | 100 | 150 | 25 |
| 21-30 | 60 | 120 | 180 | 30 |
| 31-40 | 70 | 140 | 210 | 35 |
| 41-60 | 80 | 160 | 240 | 40 |
| 61+ | 100 | 200 | 300 | 50 |
- Antibody cast, level and number of times cast
| Level | 1st Cast% | 2nd Cast% |
|---|---|---|
| 1 | 75 | 70 |
| 2 | 70 | 60 |
| 3 | 60 | 50 |
- Holy Water equipped
- Equipped: 75%
- If cheat codes are used to exceed 300HP, this can affect the damage rate and the value check go beyond the game's internal setup.
Inventory Slots
Aya can carry a maximum of 20 items on-hand at any-time. This can be anything: Weapons, armor, items, purchasable spells and ammunition. Key Items are stored separately.
The on-hand slot count shown on the inventory page is based on what inventory has not been equipped / attached to Aya. For instance: If the player has an armor and weapon equipped, and has a Recovery1, GPS and 9mm P.B. ammo attached to the armor, the maximum number of slots shown on the right side will be 15.
Following the incident at Akropolis Tower the player will have access to various storage units throughout the game that can be used to store / drop off inventory. The player will need to travel to these locations to pick up / leave equpiment and items behind. While the locations of these boxes may change as the game progresses, they will remain available until the very end of the game.
| Location | Available Slots | Includes |
| Aya's Sedan | 30 | |
| Dryfield (Motel Room 6 | 10 | 9mm P.B. x50 Stim x2 |
| Mr. Dgoulas' Pickup Truck | 20 | |
| Shelter 1F (Sterilization Room) | 20 | Grenades x8 Buckshot x20 |
| Shelter 2F (Laboratory) | 10 |
Notes:
- * The Shooting Gallery slots are re-written when using the Shooting gallery, depending on the player's selected weapon and what level they wish to play.
- Aya's Sedan will re-loacte from M.I.S.T. Headquarters to Dryfield upon driving.
- Mr. Douglas' truck will re-locate from Dryfield to the Abandoned Mine at the start of Disc 2.
- All items from Dryfield and the Abandoned Mine will become available at the Shelter towards the end of the game.
- The player starts with the following inventory when a new / replay game is started (in slots order):
- Upon completing Akropolis Tower, the following changes happen to the player's inventory:
- All starting items that are still in the player's inventory are removed.
- If that player has any of the following items in their inventory, they will be replaced with another item:
- All inventory is moved to Aya's Sedan.
- The player is issued a new set of starting inventory (in slots order):
- There are 256 inventory slots built into the game memory, yet only 110 of them (+10 for the Shooting Gallery) are available, leaving the rest of them unused. Slot #s 30, 31, 40 and 41 have a Recovery1and Slot #32 has a Stim. These are unavailable during regular gameplay and are removed from inventory once the player reaches Dryfield.
- 0-19: Aya's personal equipment
- 20-29: Shooting gallery
- 50-79: Aya's sedan
- 80-89: Motel room 6
- 90-109: Mr. Douglas' truck
- 130-149: Sterilization room
- 160-169: Laboratory
Spell Damage
Applies to all offensive spells and combat items. Unlike weapons, spells and combat items do not suffer from an attenuation penalty:
The formula for spell damage appears to be:
- FLOOR( FLOOR( FLOOR( Base Damage x Ofuda x Bonus ) x Weakness|Resistance ) x Difficulty )
- FLOOR refers to rounding a fraction down to the nearest value, regardless if the value is .001 or .999
- The spell value is rounded down three times to calculate the final damage.
| Base Damage | The 'literal' base damage of the spell/item that is listed when inspecting its data. |
| Ofuda | When attached to an armor, the spell/item damage increases by 50%. The value for this will be 1 or 1.5 |
| Bonus | The bonus damage range is 0% - 9%, in increments of 1%, meaning that final damage is one of 10 possible values: 1.00, 1.01, 1.02, 1.03, ... 1.09. |
| Weakness/Resistance | Enemies have different levels of tolerance to certain spells. For instance, Brutes take 200% fire damage while Brain Stingers take 50%. Mechanical enemies like Watchers and Derangement Speakers take none. |
| Difficulty | At higher difficulties, the player does less damage.
|
Status Effects
All status effects last for 20 seconds and turn Aya's status bar red. They may be cancelled at any time through the use of Penicillin, Stim or Metabolism (except for Berserker and Silence).
Aya Brea
![]() Berserker
Berserker
Berserker status changes how Aya fights:
- While using a weapon, each shot costs 2 HP to fire and does 50% extra damage.
- Only offensive magic is available and costs 2x the usual cost in HP, rather than MP. All spells are temporarily upgraded by one level.
This effect may also induced by Aya, given it's bonus damage benefits though the use of Eau de Toilette
![]() Blindness
Blindness
The screen is affected by a strobing darkness and the reticle is disabled, preventing Aya from targeting enemies. This does not prevent Aya from attacking, but the lack of auto-aiming can prevent her from hitting smaller targets. Spells are still aimed in the same fashion.
![]() Confusion
Confusion
Changes what the directional pad does for the player frequently. Can also cause Aya to lose track of her current target.
![]() Paralysis
Paralysis
Every few seconds, Aya stops whatever she is trying to do (attack, cast a spell, etc.) and hunches over, as though she is trying to catch her breath. This prevents her from performing any action (including moving). Rapidly moving around the analog stick / directional pad can help to shake off the effect more quickly.
![]() Poison
Poison
Gradually lose HP. The player loses 1 HP every:
- 120 frames (4 seconds) while standing still.
- 60 frames (2 seconds) while walking.
- 20 frames (0.67 seconds) while walking.
The first point is lost immediately, then a frame count is set depending on the player's current action and quickly decreases in value. When the counter reaches 0, it will deduct another point and set the frame again to the player's current actions. This can be used to time when the player runs around to avoid losing unnecessary HP should the player not wish or be unable to cure the status effect.
HP Loss Range: 5 - 30, depending on player's actions.
![]() Silence
Silence
Prevents Aya from casting spells.
NMCs
Confusion The target randomly moves around, instead of attacking/moving towards Aya. The only known enemy this affects are Bats.
Paralysis The target is completely disabled for a fixed number of seconds. Most targets will fall to the ground and twitch/spasm. While they are like this, they are unable to respond to any attacks thrown at them.
The most common way to paralyze a target include the use of Pepper Spray or casting Apobiosis. The duration is based off a combination of the enemy's own value and rate, depending on what method the player uses base appears to be based off Apobiosis Lv.1, which has a rate of 100(%). From there:
| Name | Duration (%) |
|---|---|
| Apobiosis Lv.1 | 100 |
| Apobiosis Lv.2 | 120 |
| Apobiosis Lv.3 | 150 |
| Pepper Spray | 200 |
| Other Means | 100 |
- Example: An enemy that is normally affected by paralysis for 10 seconds will be on the ground for 15 when hit by Apobiosis, Lv.3
Other less-common methods that can be used to inflict paralysis include using a Combat Light, Flare and using |Riot Grenades.
Only enemies that are affected by Paralysis will be posted below:
| Name | Seconds disabled. | ||||
| Bosses | |||||
| Boss Stranger | 4 | ||||
| No.9 | 3 | ||||
| Blizzard Chaser | 6 | ||||
| Zombie Chaser | 3 | ||||
| Sea Diver | 3 | ||||
| Brahman (Core) | 3 | ||||
| Eve | 3 * | ||||
| GOLEMs | |||||
| Pawn GOLEM | 6 | ||||
| Rook GOLEM | 6 ** | ||||
| Knight GOLEM | 4 * | ||||
| Bishop GOLEM | 4 * | ||||
| Strangers | |||||
| Grinning Stranger | 10 | ||||
| Odd Stranger | 10 | ||||
| Lesser Stranger | 10 | ||||
| Horned Stranger | 10 | ||||
| Chasers | |||||
| Chaser | 10 | ||||
| Mad Chaser | 10 | ||||
| Fatties | |||||
| Brute | 10 | ||||
| Mossback | 5 | ||||
| Slouch | 20 | ||||
| Sucklers | |||||
| Mind Suckler | (Falls to the ground)*** | ||||
| Sucklerceph | 20 | ||||
| Stalkers | |||||
| Zebra Stalker | 10 | ||||
| Gray Stalker | 8 | ||||
| Ivory Stalker | 8 | ||||
| Skull Stalker | 20 | ||||
| Misc. ANMCs | |||||
| Bog Diver | 10 | ||||
| Brain Stinger | 10 | ||||
| Scavenger | 20 | ||||
| NMCs | |||||
| Black Beetle | 10 | ||||
| Caterpillar | 10 | ||||
| Maggot | 10 | ||||
| Rat | 20 | ||||
| Scorpion (Parasite Eve II) | 20 | ||||
Notes
- * The target is 'technically' not paralyzed, but instead performs an action that behaves in a similar manner. This lasts for a certain number of seconds regardless of how the target was affected by it.
- ** The Rook GOLEM's backpack must be damaged before it can be paralyzed.
- *** As it turns out with Mind Sucklers, when they are knocked to the ground, they are inflicted with a unique form of paralysis that causes them to slowly try to escape from the player. This version does not have a time limit (Instead it operates a different timer that kills the suckler after 60 seconds).
- All Stranger types (except Creeping Stranger and Horned Stranger) have a 200% critical rate effectiveness while paralyzed.
- Zebra Stalkers has what appears to be a glitch with paralysis attacks that are caused by Darkness and Flash-based attacks: If the target has already been paralyzed once before, the frame counter will only go to 255, rather than the usual value, meaning the effect will only last for 8.5 seconds.
- Both amoeba-types can be disabled if 20 regular damage (shows up as 0) can be inflicted within a short amount of time. It is not a true paralysis, given that any attack that inflicts proper damage will cause it to go on the attack again.
- Skull Stalkers have a paralysis state, but it cannot be seen under normal circumstances since all attacks that inflict paralysis do at least 1 dmg., which is more than enough to kill it.
Poison The target develops a fuchsia hue and takes damage at regular intervals.
- The damage it takes is based off a % of it's maximum HP value.
- Every 96 frames (3.2 seconds) while poisoned, the target will take damage. This will either last for a fixed number of turns or until the target dies (unlimited).
- The only way to poison a target involves the use of the Mongoose equipped with 44 Maeda SP bullets or casting Necrosis. Necrosis, being a spell, has a lower HP% damage rate and lasts 2/3 as long as the Maeda SP bullets (rounded down); this is due to enemies have a single counter for the number of turns it will take poison damage for: 120% if using ammunition and 80% if using a spell.
Only enemies that are affected by Poison will be posted below:
| Name | HP% Damage | No. of Turns | Flinches? | ||
| 44 Maeda SP | Necrosis (Lv.1-3) | 44 Maeda SP | Necrosis | ||
| Bosses | |||||
| Boss Stranger | 16 | 4 · 6 · 8 | X | X | Yes(slight) |
| Burner | 4 | 1 · 1.5 · 2 | 6 | 4 | Yes (a lot) |
| Blizzard Chaser | 4 | 1 · 1.5 · 2 | X | X | Yes(slight) |
| Zombie Chaser | 4 | 1 · 1.5 · 2 | 24 | 16 | Yes (a lot) |
| Sea Diver | 16 | 4 · 6 · 8 | 6 | 4 | Yes |
| Puppet Stinger | 4 | 1 · 1.5 · 2 | 4 | 2 | Yes |
| Eve | 4 | 1 · 1.5 · 2 | 4 | 2 | No |
| Strangers | |||||
| Grinning Stranger | 16 | 4 · 6 · 8 | X | X | Yes(slight) |
| Odd Stranger | 16 | 4 · 6 · 8 | X | X | Yes(slight) |
| Lesser Stranger | 16 | 4 · 6 · 8 | X | X | Yes(slight) |
| Horned Stranger | 16 | 4 · 6 · 8 | 12 | 8 | Yes(slight) |
| Chasers | |||||
| Chaser | 16 | 4 · 6 · 8 | X | X | Yes(attack) |
| Mad Chaser | 16 | 4 · 6 · 8 | X | X | Yes |
| Fatties | |||||
| Brute | 16 | 4 · 6 · 8 | 24 | 16 | Yes |
| Mossback | 16 | 4 · 6 · 8 | 12 | 8 | Yes |
| Slouch | 16 | 4 · 6 · 8 | X | X | No |
| Sucklers | |||||
| Mind Suckler | 16 | 4 · 6 · 8 | X | X | Yes(slight) |
| Sucklerceph | 16 | 4 · 6 · 8 | 12 | 8 | No |
| Stalkers | |||||
| Zebra Stalker | 16 | 4 · 6 · 8 | 12 | 8 | Yes |
| Gray Stalker | 16 | 4 · 6 · 8 | 12 | 8 | No |
| Misc. ANMCs | |||||
| Bog Diver | 16 | 4 · 6 · 8 | X | X | No |
| Brain Stinger | 16 | 4 · 6 · 8 | X | X | Yes(very) |
| Scavenger | 16 | 4 · 6 · 8 | X | X | Yes |
| NMCs | |||||
| Black Beetle | 16 | 4 · 6 · 8 | X | X | Yes |
| Caterpillar | 16 | 4 · 6 · 8 | 6 | 4 | Yes |
| Green Amoeba | *Special | N/A | N/A | No | |
| Maggot | 16 | 4 · 6 · 8 | 6 | 4 | Yes |
| Rat | 16 | 4 · 6 · 8 | X | X | Yes |
| Red Amoeba | *Special | N/A | N/A | No | |
Notes:
- Turn count marked with an 'X' means it is unlimited and will continue to damage a target until they die.
- Special refers to a unique damaging attack that will kill an amoeba with one hit.
- Eve's poison rate is regularly interrupted by some of the attacks she performs, dragging how how long it takes for the effect to end, though she still takes the same amount of damage in the long run.
- Ivory Stalker was coded to take poison damage (16% w/ Maeda SP, unlimited turns), but was not implemented into the game.
Timers
Going with a rate of 30 frames per second, Parasite Eve II uses a few timers for certain in-game events. These timers are only active when Aya can be controlled on the screen. Anything else (Game paused, menu opened, spell being picked, vibration on/off, etc.) will halt any and all active timers.
- Water Gate countdown (before it closes again): 40 seconds.
- Ice Bag becomes Bag of Water: 2 minutes.
- Bringing Burner's HP below 35%: 3 minutes.
- Incinerator Countdown: 5 minutes.
Weapon Damage
Applies to all guns, attachments and melee attacks.
The formula for weapon damage is a bit complicated and appears to be:
- FLOOR( FLOOR( FLOOR( Base Damage x Bonus x Attenuation x Critical x Berserker ) x Skull Crystal x Energyshot x Weakness|Resistance ) x Difficulty )
| Base Damage | The 'literal' base damage of the spell/item that is listed when inspecting its data. |
| Bonus | The bonus damage range is 0% - 19%, in increments of 1%, meaning that final damage is one of 20 possible values: 1.00, 1.01, 1.02, 1.03, ... 1.10 ... 1.19. |
| Attenuation | See Attenuation for more details. The value range will be from 0.3 up to 1.2. |
| Critical | See Critical Hits for more details. The value for this will be 1.0 or 4.0. |
| Berserker | If Aya has been inflicted with BERSERKER status, the player will do 50% more damage. The value will be 1.0 or 1.5. |
| Skull Crystal | When attached to an armor, the weapon damage increases by 20%. The value for this will be 1.0 or 1.2 |
| Energyshot | When cast, Aya's base damages increases. Depending on if it is active, the values can be: 1.0, 1.3, 1.4, 1.5 or 1.6 |
| Weakness/Resistance | Enemies have different levels of tolerance to certain ammo. For instance, GOLEMs take 200% damage from R. Slugs while the 1st No.9 Encounter takes 75% from Grenades. |
| Difficulty | At higher difficulties, the player does less damage.
|